[row]
[col span=”3″ span__sm=”12″]
[/col]
[col span=”6″ span__sm=”12″]
[ux_image id=”347208″ image_size=”original”]
[/col]
[col span=”3″ span__sm=”12″]
[/col]
[/row]
[ux_text font_size=”1″ font_size__sm=”0.9″]
We added the Bellezza Bellona to our dual boiler line of espresso machines back in early 2023. It has attracted many potential customers with features such as its stainless steel, insulated boilers. The PID controls allows you to program preinfusion, ECO mode, and a built-in shot timer. The main feature is it’s external glass reservoir. This makes it easy to fill and monitor. The lid as also sealed to keep anything from crawling in.
[/ux_text]
[row v_align=”middle”]
[col span=”9″ span__sm=”12″]
[ux_text font_size=”1″]
The one thing that makes this machine stand out in a negative way is its height. Although the steam handle itself is a high quality part, it makes the total height of the machine ~19.25″. This eliminates itself from many kitchen countertops.
We have brought this up with the manufacturer and asked for a shorter alternative. In the meantime, we dug into our extensive parts catalog to try to find a solution.
It only takes 2 parts:
[/ux_text]
[/col]
[col span=”3″ span__sm=”12″]
[ux_image id=”347213″ image_size=”original”]
[/col]
[/row]
[row]
[col span=”2″ span__sm=”1″]
[/col]
[col span=”4″ span__sm=”4″]
[ux_text font_size=”1″ font_size__sm=”0.75″ text_align=”center”]
a knob
(w/ an M10 hole)
[/ux_text]
[ux_image id=”347198″ image_size=”original”]
[ux_text font_size=”1″ font_size__sm=”0.75″ text_align=”center”]
Here is a knob we found
(SKU V115K)
[/ux_text]
[/col]
[col span=”4″ span__sm=”4″]
[ux_text font_size=”1″ font_size__sm=”0.75″ text_align=”center”]
a screw
(M10 size)
[/ux_text]
[ux_image id=”347199″ image_size=”original”]
[ux_text font_size=”1″ font_size__sm=”0.75″ text_align=”center”]
Here is screw we found
(SKU V327K)
[/ux_text]
[/col]
[col span=”2″ span__sm=”1″]
[/col]
[/row]
[ux_text font_size=”1″ font_size__sm=”0.9″]
Installation is pretty easy:
[/ux_text]
[row]
[col span=”4″ span__sm=”12″]
[ux_image id=”347203″ image_size=”original”]
[ux_text font_size=”1″ font_size__sm=”0.9″ text_align=”center”]
Unscrew the current handle.
[/ux_text]
[/col]
[col span=”4″ span__sm=”12″]
[ux_image id=”347202″ image_size=”original”]
[ux_text font_size=”1″ font_size__sm=”0.9″ text_align=”center”]
Install the screw about halfway.
NOTE: Be careful as it can completely screw in and will be very difficult to unscrew out.
[/ux_text]
[/col]
[col span=”4″ span__sm=”12″]
[ux_image id=”347201″ image_size=”original”]
[ux_text font_size=”1″ font_size__sm=”0.9″ text_align=”center”]
Install the knob.
[/ux_text]
[/col]
[/row]
[ux_text font_size=”1″ font_size__sm=”0.9″ text_align=”center”]
Once you install, you will see that the knob stands just the below the top rails at 16.5″.
You can find these parts in the Frequently Bought Together section on the Bellezza Bellona product page.
[/ux_text]
[ux_image id=”347217″ image_size=”original”]


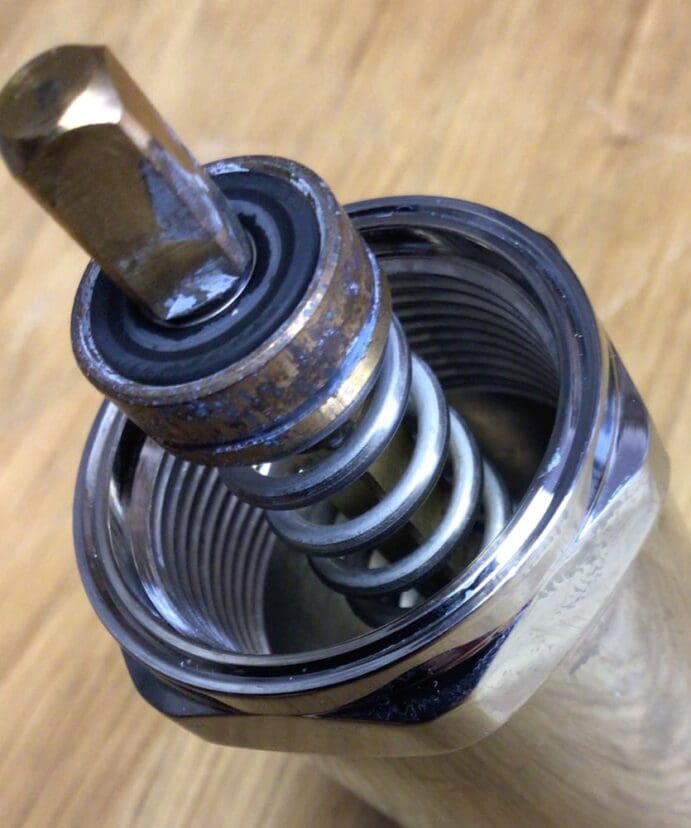 0
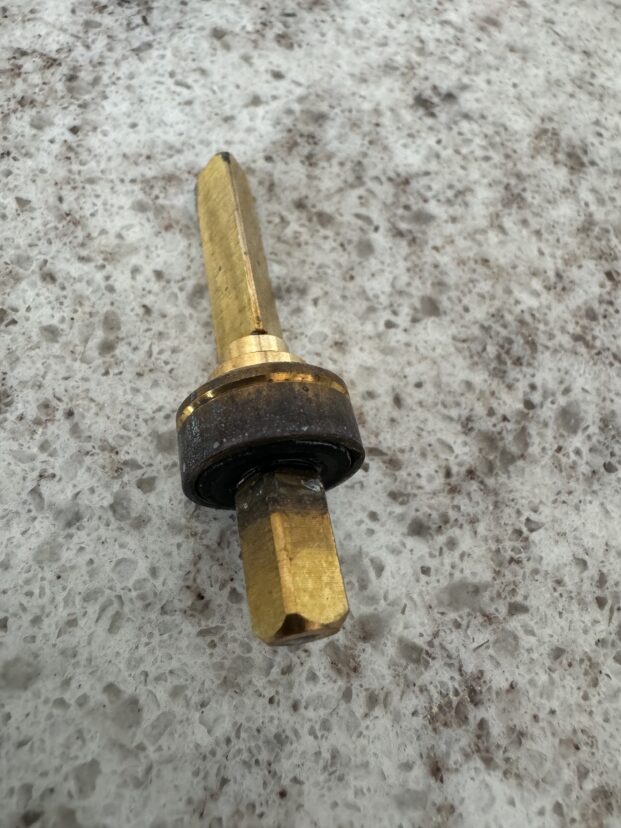
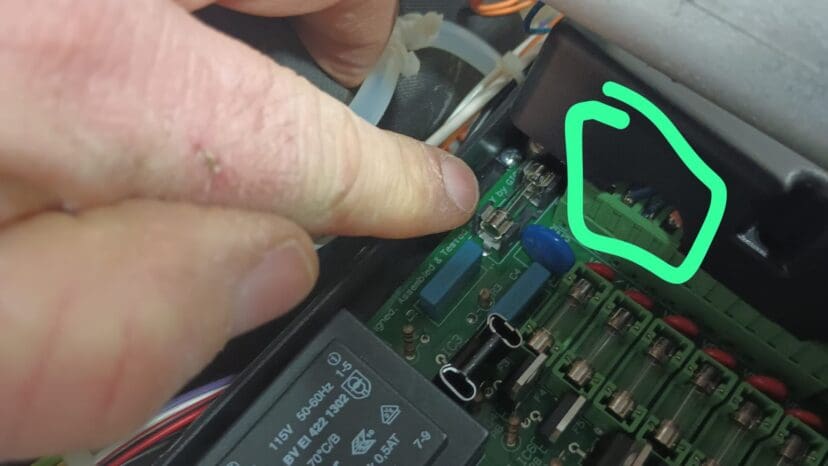
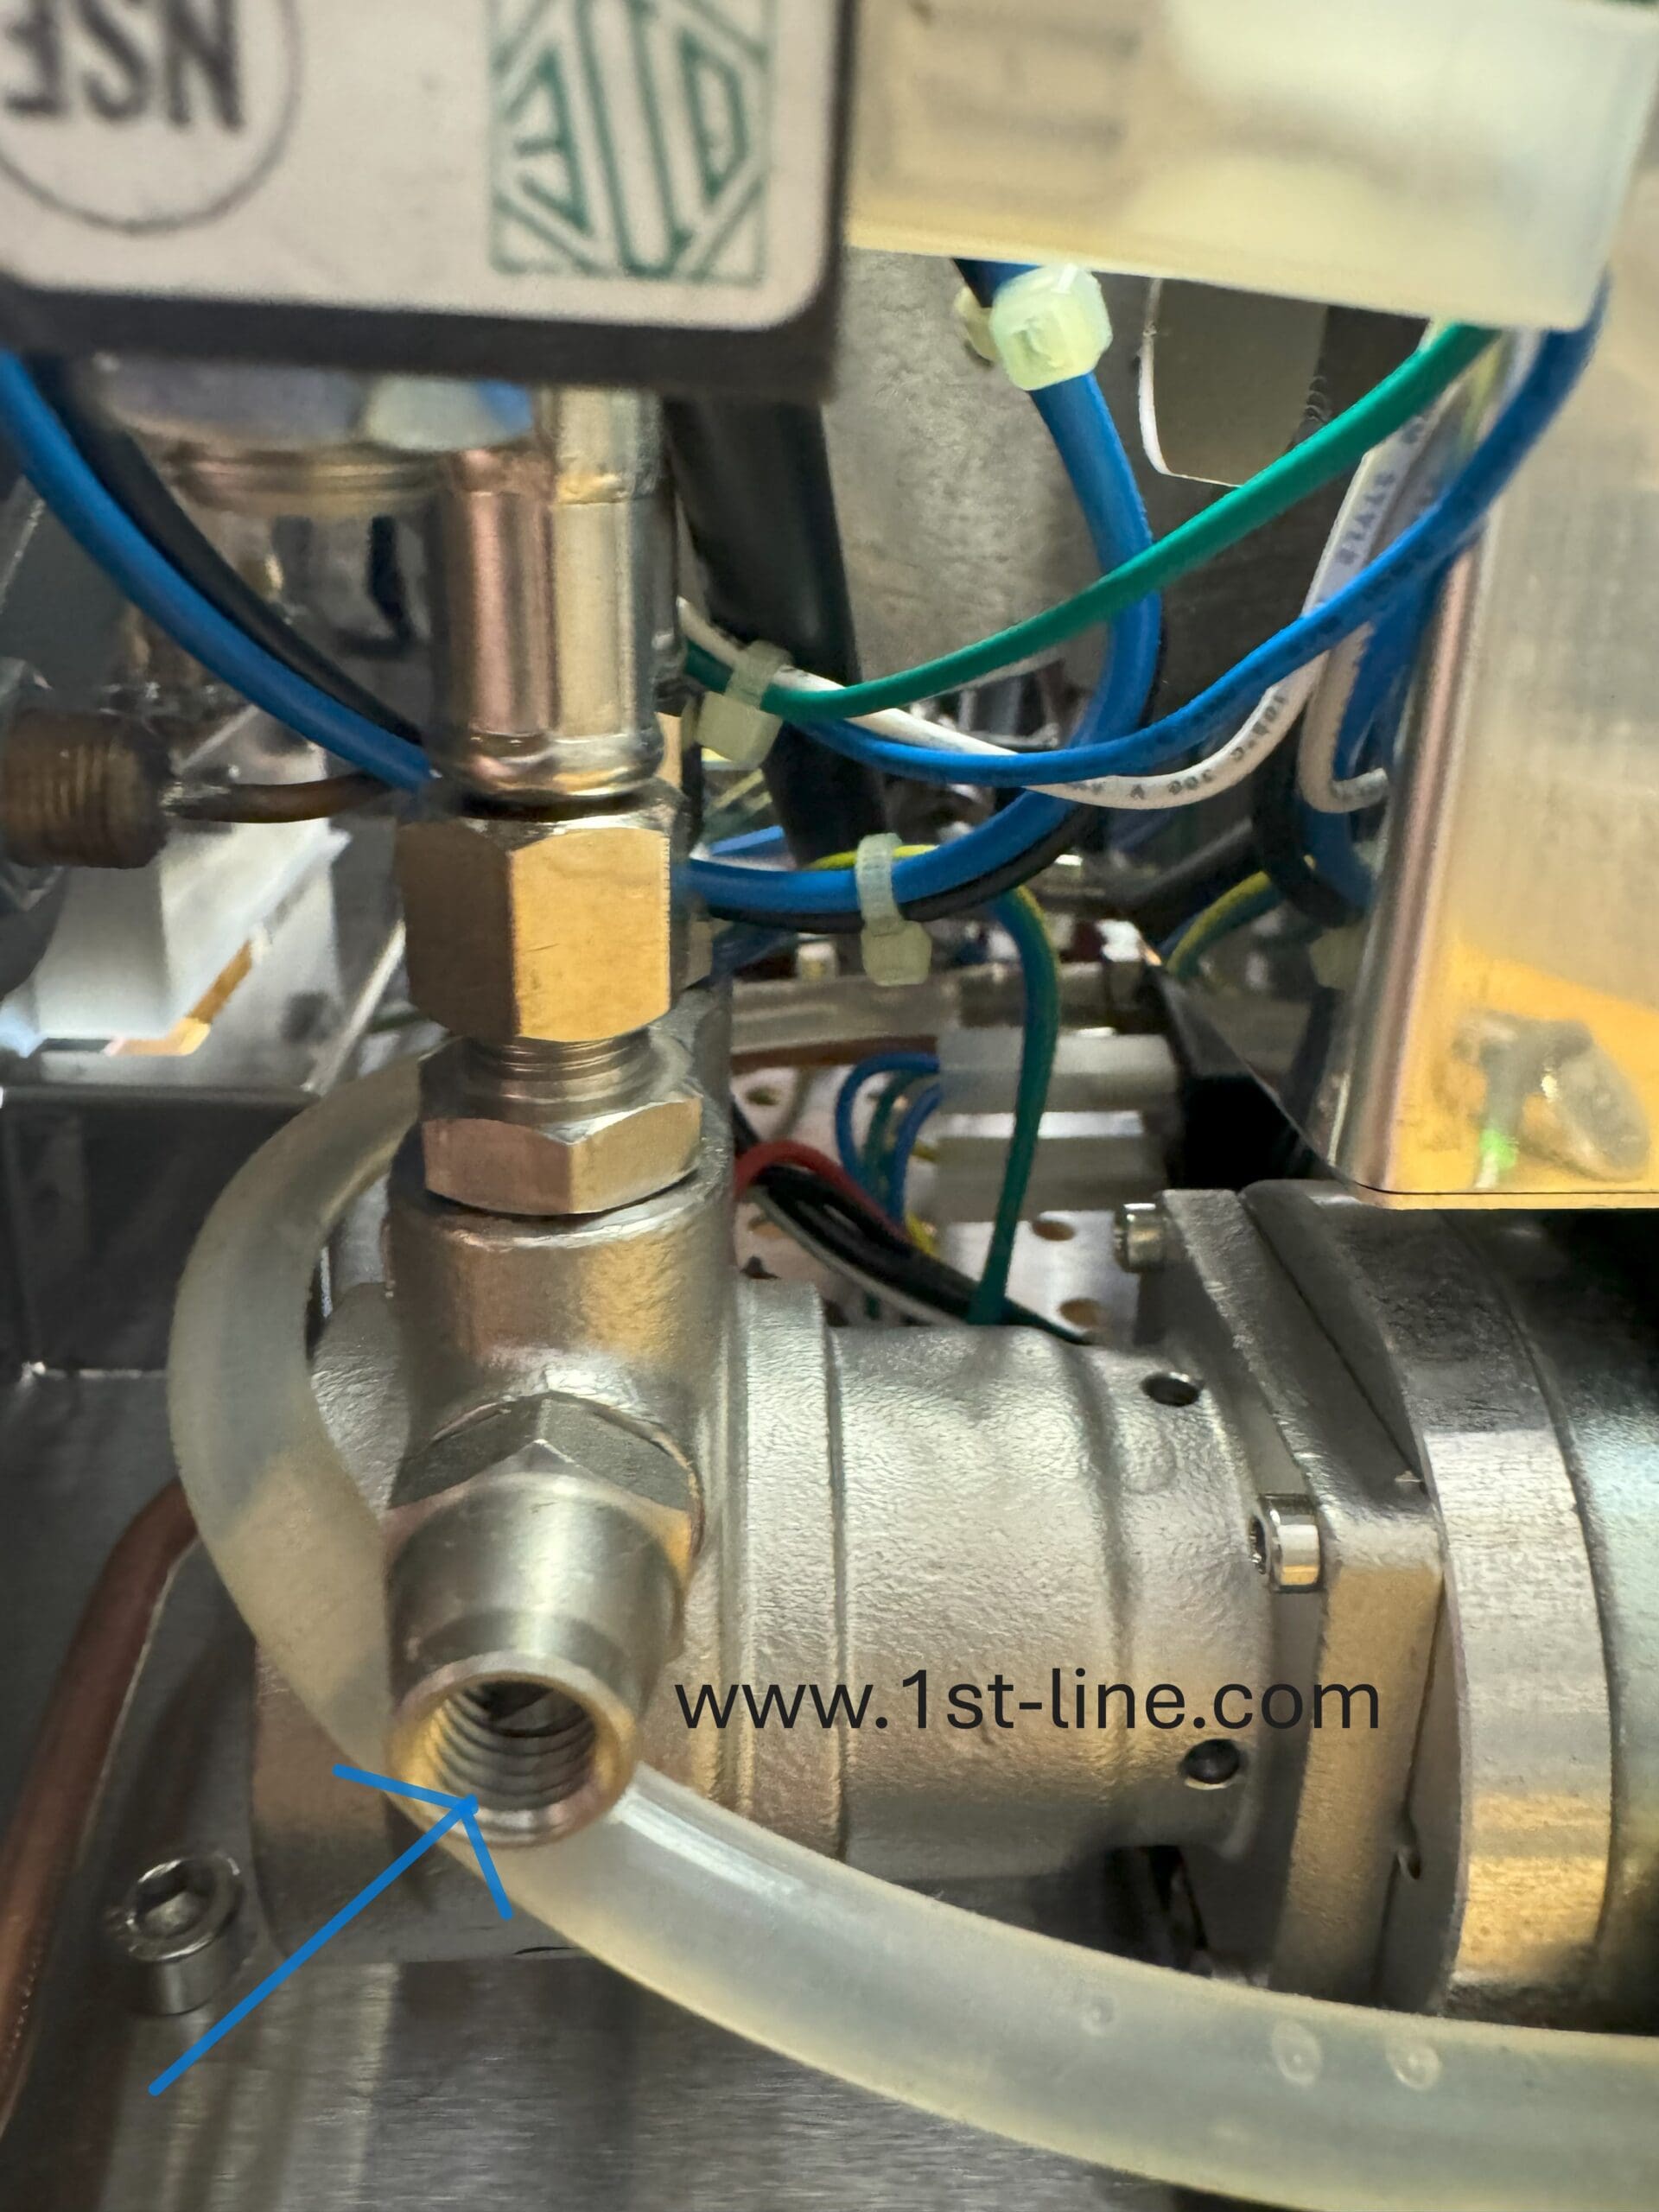
0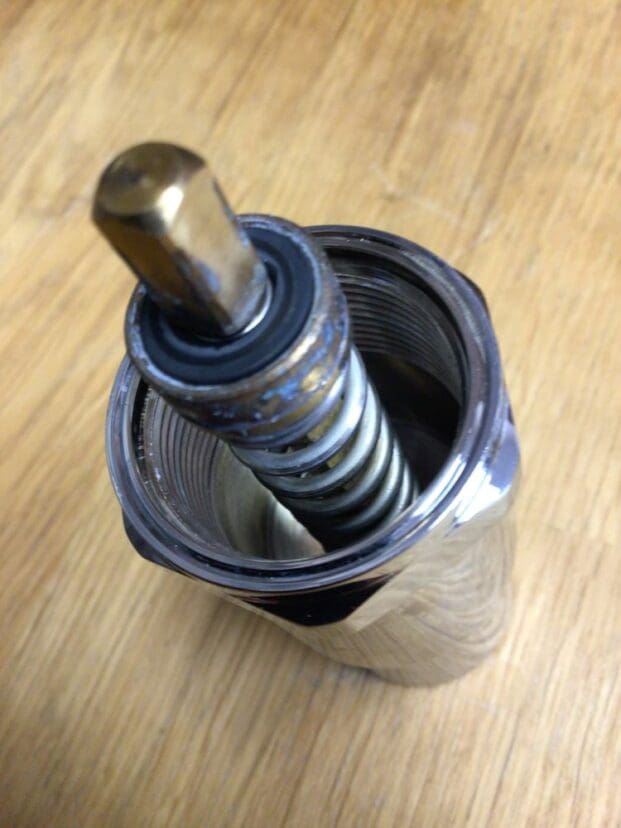 22, the entire Lelit line of espresso machines was the exception. In 2024, we had to start testing the entire Lelit line. Yesterday, we had a Lelit Bianca leaking from the manual grouphead valve. We took off the lower valve only to find build up on a brand new machine. The build up was not allowing a proper seal, and thus, when the group head lever was lifted, water leaked from the lower manual valve on the group head. In addition, the actual seal was imprinted.